


Chaos Dwarfs are a tough army, with generally expensive infantry and monsters with lots of Wounds and high Toughness. The idea is to pick off your opponent’s vulnerable units without losing whole units of your own. In many cases, one Chaos Dwarf unit costs as much as two or three units in the opposing army.
Unlike regular Dwarfs, they have more mobility and more ways to catch an opponent off guard. That comes not just from their Movement characteristics, but also from the way their units work with magic, particularly Daemonology and Elementalism.
You’ll usually want to keep the army fairly compact, covering your flanks and making it very difficult for the enemy to get in and do damage.
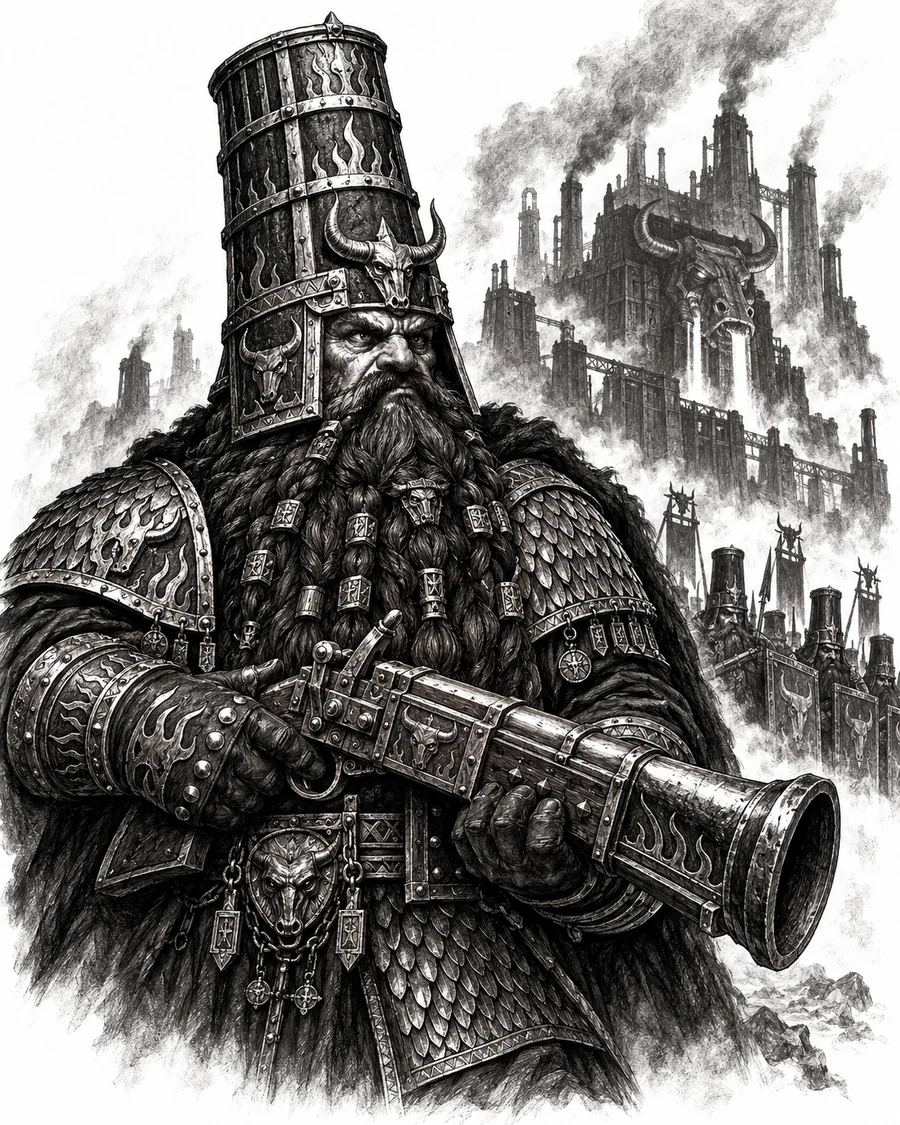
Chaos Dwarfs: strengths and weaknesses
What Chaos Dwarfs do well
Strengths:
- High Toughness. You can put a lot of Toughness 6–7 Wounds on the table, creating threats that apply real pressure and are difficult to ignore.
- Access to cheap units that sit on objectives and handle the boring jobs.
- Access to the common magic items that GW keeps expanding through Arcane Journals, unlike regular Dwarfs, who are restricted to their runes.
- Access to cheap infantry that can get in the way of expensive enemy units for very few points.
- Wizards who can cast spells, fight in combat and take a hit, thanks to their access to armour.
- Access to Lores of Magic that work well with their troops and equipment options. A wizard on a Lammasu with a breath weapon and Elementalism magic missiles is one example.
- Easy access to Terror-causing units.
What holds Chaos Dwarfs back
- You always have to take a unit of Infernal Guard.
- A lot of useless units. The army has plenty of genuinely bad units that you’ll struggle to get anything out of in almost any situation, such as K’daai Fireborn and Infernal Ironsworn.
- Apart from the war machines, most shooting units have very short range. Other armies compensate with better mobility, moving and shooting to extend their reach. That’s definitely not the case here… Dwarfs have little legs.
- You have to take certain units to unlock others. To field a Bull Centaur character, you need a unit of Bull Centaurs. To bring a Wyvern, you need a unit of Black Orc infantry. And, as I said, every single list also needs a unit of Infernal Guard.
- Poor mobility. Outside a few combinations, most of the army is built around Movement 3 or 4 infantry.
- Some badly designed rules might have a decent idea behind them, but turn out to be useless on the table. Take the Iron Daemon’s Carriage Hauler rule: it lets you tow war machines behind it like a train, with the Iron Daemon as the locomotive and the artillery following along.
These are rules that can sound sensible on a first read, but in practice don’t really do what they should. - No ongoing support from Games Workshop, like the other Legacy armies. They still benefit from additions to the common magic items and changes to the core rules, of course. Examples include Parry and infantry fighting in two ranks when charged—or, more precisely, when the infantry unit has not charged.
- A lack of mobile, lightweight support units for a good, traditional infantry army. Plenty of us enjoy that kind of list, but if that’s what you want, Chaos Dwarfs probably are not your army.
Which Chaos Dwarf army lists work best?
I have to say, there are not many options.
The first and most common option is something many other armies can’t do: field four Terror-causing Large Targets in one army. That means two Iron Daemons, a Wyvern and a wizard on a flying bull. It’s a tough setup that applies pressure from the start of the game.
There’s also the Hobgoblin block archetype. The sheer number of models makes it difficult for many opponents to deal with, and it can include blocks of Sneaky Gits to score points themselves.
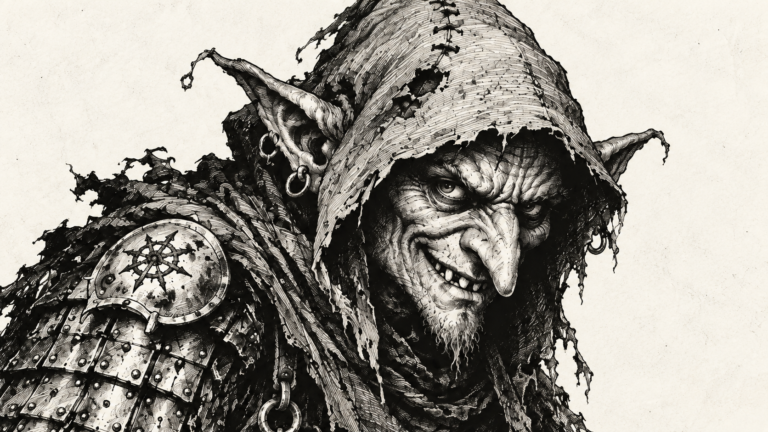
There are not many other genuinely useful options. You can go for a more traditional elite infantry list with a Black Orc character and Infernal Guard. It’s less powerful, but quite satisfying to play if you’re not trying to make your list as filthy as possible.
How to deploy a Chaos Dwarf army
Personally, I like to start with small, weak units that let me see how my opponent deploys. Here, that means units of 12–14 Goblins, if you’re taking them.
Whether you deploy them in Marching Column or Close Order depends on how far away the objectives are.
Remember that Chaos Dwarfs usually have relatively few units, and their low movement makes deployment mistakes difficult to fix later.
Where to deploy your Iron Daemons
When I have to choose between deploying an Iron Daemon and one of my infantry units, I usually try to predict where my opponent will put their expensive infantry and place the Iron Daemon opposite it. Sometimes I do this before they have deployed the unit, simply because I can see the space they’re leaving for it. The aim is to tie up that infantry with an Unbreakable unit they will find very difficult to wound, however many attacks they have.
I worry a little less about lining the Iron Daemon up against something vulnerable to its shooting. Its range is not that short, and because it can move and shoot, that’s often enough to reach a tempting, vulnerable target anyway.
If I can, I certainly like having an Iron Daemon on the flank, with a character or infantry in the centre.
Where to place your wizard and when to keep Sneaky Gits in reserve
There are two or three important things to bear in mind. If you’re using a Daemonology wizard to cast Steed of Shadows, keep them outside the enemy’s dispel range. From the start, their range and positioning should give them at least two possible targets for Steed of Shadows, making it harder for your opponent to predict where the threat will come from.
Depending on the scenario, consider whether your Sneaky Gits should start in reserve to arrive using Ambushers, or be on the table from the beginning.
Quite often, your wizards will be too far away to use their rule for re-rolling war machines’ Artillery dice. It’s a small loss that you generally just have to accept. This is one of those rules and supposed synergies I mentioned earlier: in practice, you rarely get to use it.
How to play the opening turns with Chaos Dwarfs
How to hold objectives with Hobgoblins without losing them
Whether you’re bringing Iron Daemons, lots of Sneaky Gits or flying monsters, there’s one thing you must keep in mind: Hobgoblins, like any numerous but weak infantry, can hang around as long as they don’t get into combat right at the start.
Their priority is to take objectives and stay in a position to threaten an opponent who gets carried away, without planning to fight immediately.
That stops the enemy grinding them down quickly and breaking through to our expensive units—our “points bunkers”. With Dwarfs, we want as many units as possible to survive, even if they have lost Wounds or plenty of models along the way.
How to apply pressure with Steed of Shadows
Of course, we also want to give a unit Steed of Shadows, put it right in the enemy’s face and start taking points. That could be Sneaky Gits, Black Orcs or Dwarfs with blunderbusses or fireglaives.
Ideally, cast the spell from outside your opponent’s dispel range—usually 24 inches for both sides—then move your wizard into dispel range during your Movement phase. That puts you in a position to dispel the enemy’s early-turn spells, including their enchantments and hexes, before they can move out of your range.
I really enjoy playing aggressively and getting a proper game going from the opening turns. I like each flying Large Target—the Wyvern and the wizard on a bull, Lammasu or whatever mount you’re using—to threaten several targets. If you only threaten one, your opponent can get out of your line of sight much more easily and leave you stranded.
Iron Daemon: when to risk the extra movement to get a shot
If you go first, your Iron Daemons may not be in shooting range on turn one.
Even so, I’d usually advance them using their extra D6 movement, despite the risk of rolling a one and stopping. The exception is when removing that one-in-six chance of staying stationary really matters—for example, if it would let the enemy grab far too much ground because you have nothing else to threaten them. Deployment zones are often 24 inches apart. With an 18-inch gun and a 5-inch move, you won’t reach unless you add that D6.
Before deciding whether to use the extra movement, measure the distance to the enemy. Remember your 18-inch range and 5-inch move, work out how likely you are to get a shot, and decide whether that’s worth the risk of being stuck on turn one and losing the extra threat you could have created for later turns.
Those two paragraphs in one sentence: NEVER ROLL FOR THE EXTRA MOVEMENT BEFORE MEASURING AND THINKING ABOUT WHAT YOU WANT YOUR IRON DAEMON TO DO.
When to march your wizard and when to position them for casting
The same applies to a wizard on a monstrous mount. Measure whether your spells—Elementalism spells, for example—will be in range after a normal move. Alternatively, you may prefer to march into a more threatening position, giving up first-turn casting in exchange for a better second turn.
We want positions that stop the enemy claiming all the ground before we can get into place. This is generally a slow army, and reaching objectives takes time. That’s not just down to low movement: Chaos Dwarfs usually need to deploy close together so their units can support one another and cover their flanks.
Chaos Dwarf army lists and how to play them
Your plan for the later turns depends on your list. Here are some lists to inspire you, help you understand how each one works and build your own—or simply give you something ready-made to try.
These posts include a breakdown of the list and explanations of how to play it, how to play against it and so on. You won’t just get a list with no explanation; there are already a thousand places online for that.
Chaos Dwarf matchups in The Old World
Two 2,000-point armies don’t necessarily have the same chance of winning just because they cost the same. Thinking otherwise is a huge mistake, and an illusion you might still have when you’re new to the game.
The truth is that armies are not equally strong, and different list builds don’t perform equally well against a particular opposing list.
That’s part of what makes team events interesting: pairings add another layer of strategy. You decide when to throw a teammate into a bad matchup, who is expected to score points in a given round, and whose job is to hold on and limit the damage.
With that in mind, let us look at how to approach the main army archetypes.
How to advance with Chaos Dwarfs against shooting armies
You don’t see pure gunlines that often at the moment, but you can still run into one.
The key thing in this matchup is how easy it is to give your troops cover in Warhammer: The Old World. Even partially obscuring a unit can give the enemy a −1 To Hit modifier.
If more than half the unit is obscured, that can become −2.
There are a few formations and positioning tricks that help.
Against light shooting, putting a monster in front of the unit you want to protect works very well. The monster is only wounded on sixes and still has its saves, while the unit behind it gets cover.
An Iron Daemon works too. It’s tough, moves faster than most of our troops and has Lumbering, so you can move it in front during the Movement phase and pivot it so one corner obscures PART of an infantry unit—even a millimetre of one model’s base. That gives the infantry cover: −1 To Hit is not bad at all.
Another option is a unit of skirmishers, with one model in front of the unit you want to protect and the rest behind it. That forward model obscures part of the infantry unit, giving it cover. At the same time, the infantry obscures most of the skirmishers. Apart from the one or two models out in front, the skirmishers sit behind the block, so the enemy suffers −2 To Hit them, or −3 if they have full cover: −1 for Skirmishers and −1/−2 for cover.
That lets us advance more safely, which matters when the army is generally this slow. That brings us to another problem with gunlines…
How to protect your monsters from cannons and restrictions on flying
If you face a modern gunline—Cathayan cannons, for example—with the usual magic item that stops you flying for a turn, we’re screwed. If we’re bringing monsters, we’re generally in serious trouble.
Depending on how the game looks, we can either pile on the pressure and take the risk, or hide behind any hills or impassable terrain that can protect us.
Dealing with the reduced movement is rough, especially when losing flight also costs us Swiftstride on the charge. Remember that even the Wyvern can’t re-roll its charge: the rider is a Black Orc, rather than a regular Orc Warboss, and doesn’t have Warband.
It may be worth sending Sneaky Gits after the gunline, or holding back until turn three or four before committing your monsters. In other words, keep the monsters hidden until the Sneaky Gits, if you brought them in using Ambushers, have dealt with the enemy war machines.
Either way, I see this as a matchup where you wait for your opponent to make a mistake and resist getting impatient, especially if the plan means doing very little for the first two or three turns.
That’s better than losing—unless you’re just there to roll dice and have fun, which is perfectly respectable and something we all enjoy. Here, though, we’re talking about trying to win competitive games.
How to deal with dragons using Chaos Dwarfs
Against a flying Large Target such as a High Elf or Chaos Dragon, you need to keep it busy with chaff. A Chaos Dwarf Large Target can’t beat that sort of model one-on-one. They cost more and hit harder. Be very careful.
You can try your luck with shooting in the opening turns and perhaps knock off a few Wounds. But if you can keep it busy with chaff and keep it away from your valuable pieces, such as an Iron Daemon or a wizard, so much the better.
By chaff, I mean Goblins, obviously. That’s the general plan, but that doesn’t mean you should never go for it. Once those enemy models are wounded, our Iron Daemons or monsters—a Wyvern, for example—can sometimes pull off something spectacular and finish them.
Update for the November 2026 Arcane Journal: River of Bones: watch out, because there’s a new magic item giving us Fly, Movement 8 and Ethereal. That could offer another way to deal with these creatures. We’ll see how the metagame develops and what combinations become available.
Why Chaos Dwarf war machines struggle against characters on monsters
However many war machines Chaos Dwarfs can take, they’re rubbish at dealing with these threats. They shoot like stone throwers, with Strength 6 under the centre of the template.
You’ll probably miss. If you hit, you’ll probably fail to wound. If you wound, they will probably save it.
If you include these war machines in your army, don’t do it expecting them to bring down your opponent’s 500-point model.
How to kill monsters with Iron Daemons and Sneaky Gits
Against standalone monsters, rather than heavily protected characters riding monsters, we have more options. The Iron Daemons’ organ-gun-style shooting or a good charge from one of our own monsters can do the job.
Unless it’s very late in the game, I’d try to keep the monster out of our infantry. It will gradually grind them down, especially with Stomp Attacks, while taking very little damage in return.
Sneaky Gits: shoot the monster, then Stand & Shoot
If you’re one of those mad geniuses running massive units of Sneaky Gits—around 30 models—you can put them in front of a monster and shoot with the whole unit, using their Skirmish formation to inflict a lot of Wounds or kill it outright. They don’t block one another’s line of sight because the target is a Large Target. If it survives and charges you, the Thrown Weapons rule lets you Stand & Shoot regardless of how close it is. That should finish it off.
Chaos Dwarfs against deathstars: why shooting is not enough
I’m not just talking about the current metagame deathstars. I mean any deathstar you can build, including High Elf Sisters of Avelorn.
What useful options do we have here? I’m going to repeat myself, and I’m sorry for being so pessimistic about our artillery, but my fellow Chaos Dwarfs…
What those war machines do for their points is very limited. If they could at least hold objectives, we could leave one in an important spot and advance with everything else. But for 120 points, they can’t even do that. It’s pretty absurd.
Remember that a deathstar will usually have something to protect it, beyond simply having lots of models.
A Chaos Knight deathstar has Magic Resistance and armour. A Gor deathstar can fly into your face and increase its Toughness through Daemonology. That leaves you very little time to shoot.
So yes, your war machine might use the large template instead of the small one, but with Strength 3 and little or no Armour Piercing… come on. Bullshit.
How to contain a deathstar: flee, find flanks and remove its support
With all that said, what can we actually do? What works? Basically, you need to outplay your opponent and keep their deathstar chasing things it can’t catch, despite our crappy movement.
Remember that fleeing is an available charge reaction—as long as the unit is not Immune to Psychology or Unbreakable, like the Iron Daemon.
If the enemy declares a long charge against your Infernal Guard, seriously consider fleeing. Live to fight another day, like a proper sewer rat. Joking aside, you’ll be rallying on Leadership 9 or 10 next turn. You’re not just costing them a round of combat; you’re also costing them a turn of shooting or a magic missile.
We need to look for flanks with our mobile units and, above all, focus on removing their support. A deathstar is still just one unit, and a lone unit can only do so much in Warhammer without support to set up selective charges. Supporting units can let the main unit fight, Overrun and fight again several times in the same turn.
As always, be careful about sending a single character into the unit, even on a Bale Taurus. In the best-case scenario, they probably won’t kill your character, but they will beat you on rank bonus, Unit Strength, Close Order and so on, giving them free movement. And that assumes you don’t roll low enough when fleeing for them to catch you.
If you want to rack up kills, make a combined charge with another model that can accept the challenge while your main character attacks the unit.
Don’t get your hopes up too much, though. These units rarely flee at the first opportunity unless shooting has already worn them down badly. As I said, I’d generally shoot their support rather than the deathstar itself, leaving the big unit isolated.
How to play Chaos Dwarfs against hordes and Night Goblins
At the moment, there are not many horde armies in the metagame beyond the usual Night Goblins. I will try to discuss hordes in general, but I will be thinking about Night Goblins throughout, partly out of habit and partly because they have Fanatics.
Don’t try to outdeploy them. It’s literally impossible. They have so many drops that you’ll never get to deploy your important unit after theirs.
Keep your formation as tight as possible so their own troops get in one another’s way. An Iron Daemon is an incredible flank guard against things that can barely hurt it, which is exactly what a horde army tends to contain.
Make the most of that. One of our units can deal with two or three of theirs at once. Unless you get very lucky, though, you probably won’t wipe them out.
There’s usually at least one unit in the horde with a decent chunk of points tied up in it. Try to score there instead of focusing on units that are barely worth anything.
Remember our flying Large Targets. They can see over the enemy horde and move over it too. That’s excellent: threatening several targets at once restricts and complicates the enemy’s movement.
Against a horde, I’d focus on two nearby secondary objectives. Don’t try to claim everything—not even three objectives in a scenario with four.
Chaos Dwarfs against Wood Elves and other mobile armies
My starting point in these matchups is to stay together, avoid mindlessly chasing them around and, above all, trust in flying Sneaky Gits and Iron Daemons, which can move and still shoot at Strength 5.
Those units will do most of the damage. A wizard with magic missiles will help a lot too. Everything else needs to hold on and wait for the opponent to make a mistake.
Use your flying monster to threaten their fancy manoeuvres and stop them positioning wherever they like. If you keep a monster back, they won’t normally move into its charge range unless they’re offering a rubbish unit as bait, or a more respectable unit that plans to flee as its charge reaction.
If you let them try that fleeing trick, weigh up whether the charge is worthwhile. I usually look for a chance to make two units flee: if there’s a second target I can redirect into, and that one will probably flee too, it can be worth it.
Before declaring the charge, think about where you’ll end up if the enemy flees.
An army like ours is usually very frustrating for that sort of opponent. It’s generally a good matchup because they lack the damage to destroy one of our Hobgoblin blocks in a single turn.
If our build uses a small Infernal Guard unit and we want to hide it, they will have a very hard time getting to it.
With BS4, Strength 5 shooting and the ability to move before firing, an Iron Daemon can do serious damage. If it doesn’t, it will be because we rolled badly, which nobody knows until we actually shoot. The threat is always there, and it puts real limits on their movement.
Enjoy the matchup, exploit their mistakes—and they will make some—and score as many points as possible by destroying those vulnerable units they tend to bring. They’re so satisfying to kill.
Mistakes that lose games with Chaos Dwarfs
Building an army list without a battle plan
First, getting the battle plan wrong. You should have a plan from the moment you build your list. Choose the units you want to play around, then make everything else complement or support them.
That’s the opposite of throwing in random units with no connection or synergy, whose only shared quality is that they add up to a points limit—usually 2,000.
Once you have a coherent list, adapt the battle plan to your opponent’s army when they explain it to you.
At an event with open lists, you can do your homework and think it through beforehand 😉
Deploying without accounting for the army’s poor mobility
Bad deployment is another big mistake. Chaos Dwarfs have poor mobility, both because their movement is generally awful and because they lack units with rules such as Skirmishers, Swiftstride or Fly. Deployment errors are expensive, and meaningful repositioning is very difficult afterwards.
These are not Wood Elves, folks… they’re stumpy little blokes and their slaves.
Advancing too far and leaving units unsupported
Moving when you shouldn’t. Some people seem to think that being able to march eight inches means they have to move the full eight.
Our army contains elements with very different movement capabilities, including war machines that don’t move at all. If you advance too far, you can open a gap between a unit’s rear or flank and the rest of the army. That mistake can become impossible to fix, leaving an expensive or vulnerable unit exposed.
Be very careful with that.
Getting into combat too early
Chaos Dwarfs are generally resilient, whether through high Toughness and plenty of Wounds or simply through big Hobgoblin units. They’re hard to wipe out completely. Get into combat too early, though, and you’re much more likely to lose entire units.
Sending a unit forward with Steed of Shadows without support
That warning about moving too far includes the flying spell. If the unit you send forward is your only source of pressure, it needs very careful positioning. Your opponent can focus everything on destroying it without sacrificing or trading any of their own units.
I see it happen all the time: flying Black Orcs or Hobgoblins get charged—or simply blasted apart by spells without being charged at all—and the Chaos Dwarf player can neither prevent it nor get anything out of the sacrifice afterwards.
Call it an accidental sacrifice, or just a badly planned one: the player didn’t think one or two turns ahead about what would happen afterwards.
Not fleeing when it could save your unit
I know Dwarfs don’t flee much, with Resolute and their three-inch movement. But sometimes an enemy unit that could wreck you—Orc Boar Boyz or Dragon Princes of Caledor, for example—must attempt a maximum-range charge because of Impetuous or Frenzy. Fleeing can make catching you very difficult or outright impossible, and it may be the only way to save the unit or the game.
I have Dwarf-playing friends who say a Dwarf never flees. That’s nonsense. Once a Dwarf rallies, remember that it behaves like other troops: it can reform, march and even shoot.
That can give you the repositioning your Dwarf army usually lacks. Their Leadership is very high, whether through Warband or their natural Leadership, which can improve near the General or with a musician.
By the way, I recommend skipping musicians most of the time. Those points rarely pay off and can help you make the rest of your list fit.
Ideas for building a Chaos Dwarf army
This section is not just about competitive lists. These are army concepts I can imagine working, or have played myself, using Chaos Dwarfs.
- A legion of Goblin slaves led by a handful of Chaos Dwarf slavers.
- An elite Chaos Dwarf infantry army supported by small Goblin units doing the objective work: units of twelve that stay back and hold objectives.
- An army built around template-firing war machines, with very unpredictable results because the shots scatter.
- A Black Orc army. This is another elite infantry force, but with a character all of its own.
- The more familiar Large Target army, with Iron Daemons and characters on monstrous mounts.
- An army of wizards on Lammasus. Remember that the lesser wizard can ride a Lammasu and buy a Strength 4, AP −2 breath weapon.
- I also think a Bull Centaur army could be worth trying. I have not tested this one, obviously, but I can see a list built around Bull Centaurs, Hobgoblin Wolf Riders and several Bull Centaur characters.
Three Bull Centaur characters and three units of Bull Centaurs could be fun for a game of positioning and counter-charging. It’s the most mobile version I can think of, with plenty of minimum-sized Hobgoblin units covering the Core requirement and giving you reliable objective holders.
Which miniatures to use for Chaos Dwarfs in The Old World
Sorcerer-Prophet and Daemonsmith Sorcerer: which models to use
Let’s start with the characters. I’d use two different models here. The Age of Sigmar Daemonsmith works as a Sorcerer-Prophet or Daemonsmith Sorcerer: it has a spell in its hand and clearly looks like a wizard.
Infernal Castellan and Infernal Seneschal: which models to use
The other option is the Helsmiths of Hashut War Despot, a more heavily armed and elaborately decorated Chaos Dwarf. I’d use it as an Infernal Castellan or Infernal Seneschal. If you don’t want your wizard holding a spell, it could also work as a Sorcerer-Prophet.
You could also do a small conversion using a warrior from one of your units to represent the Infernal Seneschal, including as a Battle Standard Bearer. The new models are lovely, so you have plenty of good starting points.
Sorcerer-Prophet on Bale Taurus: which model to use
To represent a Sorcerer-Prophet on Bale Taurus, I’d use Urak Taar, the First Daemonsmith / Daemonsmith on Infernal Taurus. I should say that I don’t use that model myself: mine uses the Age of Sigmar Beastmen spell depicting a half-summoned bull, but that’s no longer sold.
Bull Centaur Taur’ruk and Bull Centaur Renders
For the Bull Centaur Taur’ruk, I’d convert one of the Age of Sigmar Bull Centaurs using Infernal Guard bits and extra ornamentation to make the character stand out.
I can’t say I love those models. I don’t know whether the upper bodies lack movement or the maces are just too big, but something doesn’t quite work for me. Even so, I can’t think of a better option.
I’d also use the centaurs from that same box for Bull Centaur Renders.
Three model options for a Hobgoblin Khan
- My favourite is Droggz da Sunchompa, the Age of Sigmar Goblin riding a wolf on a rocky outcrop. It’s an incredible model. The Hobgoblin Khan’s rules are far too underwhelming for a miniature that impressive.
- If you want something less extravagant for a character that doesn’t do all that much, I’d use the champion from the Snarlpack Cavalry. These are the Age of Sigmar wolves with two Goblins riding each one.
- The third option is the leader from Snarlboss and Wolfgit Retinue, formerly Rippa’s Underworlds warband: the Goblin holding his sword behind him. It’s a great model, though less impressive than the other two in my opinion.
I didn’t buy that warband to play Underworlds; I got those models in Spearhead: Snarlpack Huntaz.
Black Orc Warboss and Black Orc Bigboss on foot: models and alternatives
There are plenty of options for a Black Orc Warboss or Black Orc Bigboss on foot, including several older special-edition models. I think the Black Orc Bigboss released for The Old World alongside the Orcs book is fantastic. I can’t find it on Wayland or Amazon; perhaps it’s now only available from GW directly.
I use the metal Grimgor Ironhide, because I love that model and always have. Other special-edition Black Orc characters can work too.
Black Orc Warboss and Black Orc Bigboss on boar: conversion ideas
There’s no Orc boss on boar model that I particularly like. My choice would be to convert the mounted character from the Orc Bosses box, which includes a boss on foot, a standard bearer and another boss on a boar. Give him a Black Orc mask or head, along with some proper shoulder armour.
For bits, I’d use the Age of Sigmar Orruk Ardboys. You can use their heads or cut up one of the bodies to adapt it. Their spears work nicely for a boar-mounted character, and they have some pretty cool swords too.
The shield is the one bit that doesn’t really work for me. I’d look for a smaller one with a more traditional look.
Black Orc Warboss on Wyvern: conversion ideas
For a Black Orc Warboss on Wyvern, I really dislike the Megaboss on Maw-krusha, nicknamed “the lettuce”. It’s also very wide, which can make fitting it on such a narrow base a real headache. In Age of Sigmar, its base is practically a paella pan.
I have two converted Wyverns, made in these two ways:
- One is based on the Kruleboyz Sludgeraker Beast. I added wings using melted plastic. It was a massive pain in the arse, and I wouldn’t recommend that process to anyone.
- The other is based on a dragon from the Stormcast Eternals Stormdrake Guard kit. I left off the front legs, filled the gaps with putty and changed the head.
Infernal Guard and Infernal Ironsworn: which models to use
If you don’t own the old Warhammer Fantasy models, I think the Age of Sigmar Infernal Cohort is a very good option for Infernal Guard. I’d use it for Infernal Ironsworn too.
Hobgoblin Cutthroats and Sneaky Gits: representing them and telling them apart
I like the same models for both Hobgoblin Cutthroats and Sneaky Gits: Hobgrot Slittaz. But using the same models for everything is a bit crap. To distinguish them, especially if you already have an Orc army, I’d use a Night Goblin Mob for the Core Hobgoblin Cutthroats and keep the Hobgrots for Sneaky Gits.
Black Orc Mob: models and the trouble with ranking them up
Here is the problem: both old and new Black Orc models are awkward to rank up. I use the Age of Sigmar Orruk Ardboys because I really like them.
They’re pretty big. Mine are on round bases, placed on a square movement tray for the whole regiment.
There are also the traditional plastic Black Orcs, but for me they lack the charm of the old metal models—like that standard with a Dwarf impaled on a pole. I can’t think of an option I like more than the new ones.
K’daai Fireborn
For K’daai Fireborn, I’d look for a 3D-printed alternative. I don’t have a particular model to recommend.
Hobgoblin Wolf Riders: alternatives and base-size problems
For Hobgoblin Wolf Riders, I’d use the options mentioned earlier: Snarlboss and Wolfgit Retinue, formerly Rippa’s Underworlds warband, or the Snarlpack Cavalry with two Goblins on each wolf.
They’re fantastic models, but fitting them onto our riders’ 25 × 50 mm bases can be tricky, especially the wolves carrying two Goblins. They’re bigger and were not designed for those bases.
You can position them to use as skirmishers without too much trouble, but they get in the way when brought close to other models, such as an Iron Daemon.
Which models to use as an Iron Daemon
There are several alternatives for the Iron Daemon, depending on the look you want for your army. I like the Chaos Space Marines Venomcrawler with a bit of conversion work.
I don’t like the original Forge World locomotive on its own. The complete train, with the war machines and cannons behind it, was very good for its time, though I think we have better options nowadays.
- Chaos Space Marines Venomcrawler, with a few modifications. The linked box is Warpforged: Venomcrawler and Obliterators, containing one Venomcrawler and two Obliterators.
- Chaos Space Marines Forgefiend. This is the alternative I have seen used most often, although it’s the one I like least. I’m not keen on the plasma cannons or the head.
- The Kharadron ships: the Arkanaut Frigate or the Grundstok Gunhauler. They have cannons and could look very interesting with Chaos Dwarf heads replacing the crew’s heads. I’d also file off or cover the original symbols with Hashut symbols or Chaos stars.
- The Helsmiths of Hashut Dominator Engine, a sort of bipedal metal bull that can be built with cannons on its arms. It’s a pretty unconventional take on an Iron Daemon, but I like it.
Magma Cannon and Dreadquake Mortar: models and conversions
The Dwarfen Flame Cannon could work as a Magma Cannon. You could also convert a Dwarf Cannon / Organ Gun using bits from the Age of Sigmar Chaos Dwarfs.
Honestly, I can’t think of much else.
Deathshrieker Rocket Launcher: which model to use
For the Deathshrieker Rocket Launcher, I’d use the Age of Sigmar Deathshrieker Rocket Battery.
Hobgoblin Bolt Thrower: the classic model or a Kruleboyz conversion
- The classic metal Goblin bolt thrower. I have never been particularly keen on it, but it’s an option if you want something straightforward without converting it. I can’t find a purchase link; perhaps GW still sells it directly, or perhaps not even there.
- The Kruleboyz Beast-skewer Killbow, if you would prefer a newer plastic model. Its base is very long and it comes with an Orruk, so you’ll need to make substantial changes. You can do something interesting with it, but fitting it onto the right base is not easy. I have done it three times, but it’s not easy.
Hellcannon
The Hellcannon model came out with the Storm of Chaos campaign. I never liked it—it’s a great lump of a thing—but if you do, I think GW still sells it on its website. Otherwise, I’d look for a 3D-printed alternative.
Are Chaos Dwarfs competitive in The Old World?
As you can see, this army only has a couple of competitive list options and a lot of units that are either useless or pretty bad, as I discussed in my tier list post.
It’s really interesting when the same units work differently in another army. The Orc character, for example, plays differently here thanks to Daemonology support. That’s a neat interaction.
Even so, I’d call Chaos Dwarfs one of the strongest and most playable Legacy armies, alongside Lizardmen—or… yes, Lizardmen.
The catch is that you’re stuck with very specific units, combinations and fairly rigid battle plans if you want to compete with armies that still receive support from Games Workshop.
Any errors in the post? feel free to reach out at theoldwarrior@theoldwarrior.com.