


Well, guys, I’ve been really into Chaos Dwarfs for about a month now. I’m not entirely sure why, but here we are.
Today we’re looking at a hard-hitting list of my own that I really like because it includes some of the army’s most distinctive elements: mutated Dwarfs, a winged bull, and plenty of slaves.
The idea is to build a list that looks great, captures what the army is about, and can still hold its own competitively. So, sorry, but some units didn’t make the cut, even though I wish they were more viable, as I explained in my Chaos Dwarfs tier list post.
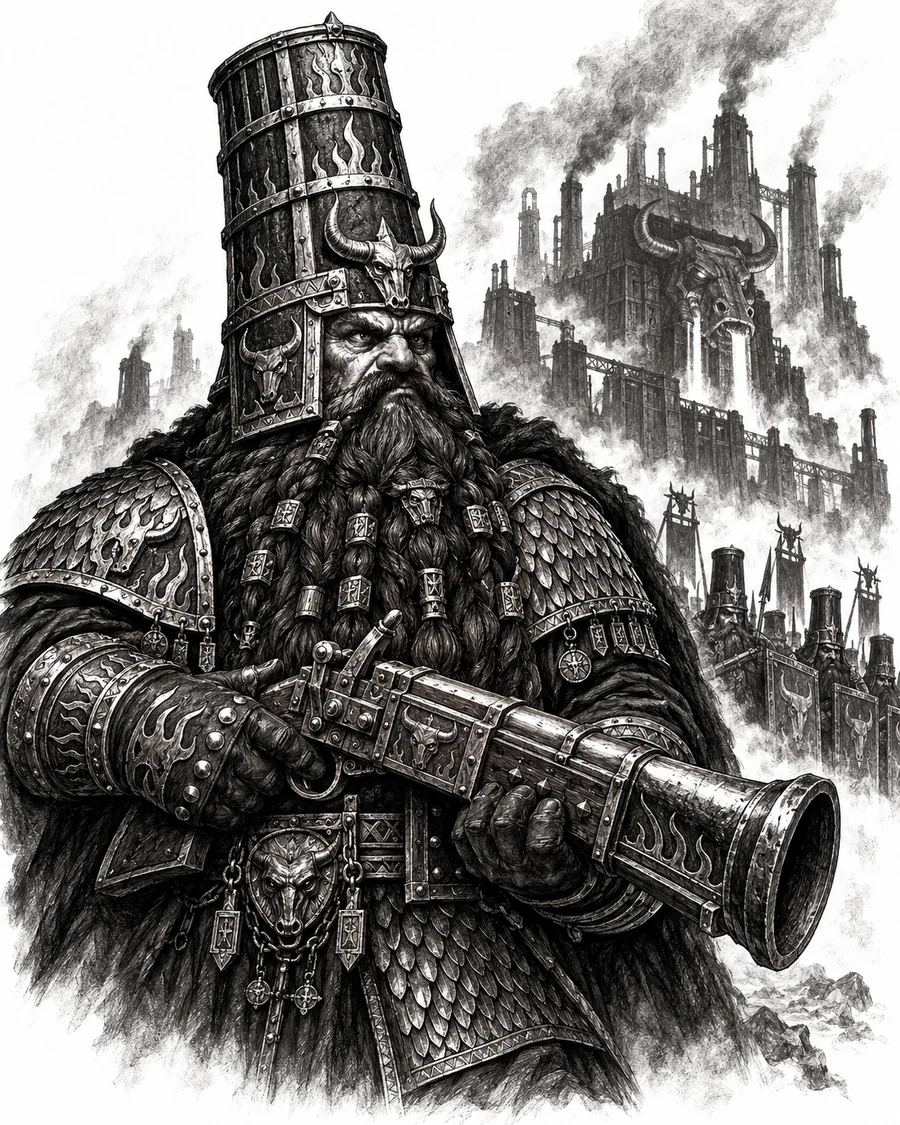
2,000-Point Chaos Dwarfs Army List for Warhammer: The Old World
Characters — 764 points
Sorcerer-Prophet — 445 points
- Darkforged weapon
- Heavy armour
- Level 3 Wizard
- General
- Bale Taurus
- Mantle of Stone
- Talisman of Protection
- Armour of Meteoric Iron
- Daemonology
Black Orc Warboss — 319 points
- Great weapon
- Full plate armour
- Wyvern
- Trollhide Trousers
- Enchanted Shield
Core — 556 points
10 Infernal Guard — 126 points
- Hand weapons
- Heavy armour
- Shield
- Deathmask (champion)
30 Hobgoblin Cutthroats — 97 points
- Hand weapons
- Shields
- Boss (champion)
30 Hobgoblin Cutthroats — 97 points
- Hand weapons
- Shields
- Boss (champion)
16 Black Orc Mob — 236 points
- Hand weapon
- Full plate armour
- Stubborn
- 12x Shields
- 2x Great weapon
- Boss
- Standard bearer
Special — 680 points
Iron Daemon — 310 points
- Steam Cannonade
- Hand weapons
- Hellbound
Iron Daemon — 310 points
- Steam Cannonade
- Hand weapons
- Hellbound
10 Sneaky Gits — 60 points
- Two hand weapons
- Throwing weapons
TOTAL: 2000 points
How to Play This Chaos Dwarfs Army List
As you can see, we have some very fast units and others that move at a snail’s pace.
But before we talk about moving them around, let’s start with something we need to do before the game even begins: choosing our spells.
Magic: A Tool, Not a Requirement
We only have a Level 3 Wizard, so we’re going in with a pretty clear plan. He’s using Daemonology, and we want to skip this lore’s Magic Missiles and Magical Vortexes, mainly keeping the buffs (Enchantments) and, depending on the matchup, the Assailment or the Hex.
The Hex might look great, but we often won’t be able to use it. So the choice really depends on the enemy list and whether it has units with enough armor to make reducing it with that spell worthwhile.
Either way, there are several combos we can take advantage of beyond the usual buffs, which are pretty straightforward and don’t need much explanation.
Keep in mind that almost our entire army is infantry. That makes Steed of Shadows an excellent way to push the Black Orcs forward and get them into combat quickly.
We can also use it on the Sneaky Gits so they can shoot an enemy unit to pieces, or to get them behind enemy lines and set up a combined charge with another of our units. Remember that when they attack an enemy’s flank or rear, their Backstab rule lets them re-roll failed rolls To Hit, which is pretty nice when they’re carrying two hand weapons.
Notice that this list has magic, but doesn’t rely on magic. We can take advantage of different spells and their effects, but we don’t have to get those spells for the army to work. That’s exactly what I was looking for.
Either way, remember that if we don’t get Steed of Shadows, we can often use the Sneaky Gits as Ambushers, and they’re still very good. When they arrive, they can throw their weapons nine inches with Ballistic Skill 4, which can be a pleasant surprise.
The Two Flying Characters
For magic items and characters, let’s start with our Wizard riding the winged bull.
The Sorcerer-Prophet isn’t particularly reliable in melee, since his three attacks and a weapon with a completely random effect don’t exactly make him a combat powerhouse. But he has seven Wounds and Toughness 7 at a minimum. I say at a minimum because Sorcerer’s Curse could make him lose a Wound and gain another point of Toughness if he miscasts and fails the resulting Toughness test. It’s very unlikely to happen. I’m just saying it’s possible, even if the odds are pretty low.
The way I’ve split the magic items between the Sorcerer-Prophet and the Black Orc Warboss comes down to a simple idea: we want both of them to be as tough as possible. The problem is that we can’t take the Talisman of Protection twice, which is ideally what we’d want on both characters. So, since the Black Orc Warboss can get a better armor save, has Regeneration, and can also use a shield, I’ve given him an item that provides a 6+ Ward save.
Honestly, both characters can take a beating. And the best part is that they’re both very mobile. We already know that Large Target and Fly are a winning combination.
Depending on the opposing list, these two characters can threaten almost the entire board, create several different threats in the same turn, or charge the same unit together. That last option is particularly useful when the enemy regiment has a champion, because it lets us set up a much more favorable combat.
When we do this, I always issue the challenge with the Dwarf first. Why? Because the Black Orc’s Wyvern has that wonderful rule that makes its tail attack strike first.
And if the tail attack kills the enemy champion, the remaining attacks, including the Stomp Attacks, are wasted. We can’t score any more wounds through Overkill, which leaves us in a much worse position when it comes to winning combat.
You have no idea how many times I’ve been short on options in a game, had to charge with my Wyvern, and watched that damn tail kill the champion and leave me completely screwed.
It’s true that we then have Leadership 9 from the Black Orc Warboss himself, or even Leadership 10 thanks to the Sorcerer-Prophet, to help us avoid breaking from combat.
But you never know. At the end of the day, this is a dice game.
Infantry and Iron Daemons in The Old World
The flying characters work very well with fire support from the Iron Daemons, which can clear away enemy troops that might get in their way or interfere with their charges.
The infantry, meanwhile, brings something essential: Unit Strength and combat result bonuses. That becomes particularly useful when we can combine a charge from one of our characters with an infantry block joining the fight. It’s not all about causing casualties; we also need to keep those combat result bonuses in mind.
The Iron Daemons are also great at covering our infantry’s flanks. They’re extremely tough, and although they can’t shoot in every direction, they can turn and fire. That makes them very good at protecting the sides of our blocks, stopping the opponent from easily getting around them and threatening their flanks. And with BS 4, their shooting can be pretty devastating.
How to Play AGAINST This Chaos Dwarfs Army List
Keep Their Magic Under Control
The first thing is managing the enemy’s magic. Pay close attention and keep track of the spells the Sorcerer-Prophet has available. He can’t use all of them every turn, because his vision arc and whether he’s engaged in combat both matter.
In general, keep an eye on who he can buff, especially if he can buff the Black Orcs or another unit that’s about to fight. The other Enchantment has a range of Self, so he can only cast it on himself.
What can really affect our movement and deployment, though, is the possibility that he has Steed of Shadows. We need to try to anticipate which unit he wants to cast it on. And we can usually figure that out by looking at his deployment.
For example, if he wants to cast it on the Black Orcs, he’ll probably position the block so that at least a small corner sits within the Wizard’s vision arc, allowing him to cast the spell before moving.
When a Wizard is on foot with a 360-degree vision arc, this play is harder to predict. But here, since our Wizard is mounted and only has a 90-degree vision arc, we can fairly easily work out where he’ll try it from.
Knowing that, if we get the first turn, we should move far enough forward to bring the enemy Wizard within our Wizard’s dispel range. Obviously, he’s more likely to cast the spell than we are to dispel it, but Steed of Shadows has so much potential that it’s worth having the chance.
If our opponent goes first, though, we probably can’t do anything about it. A player who knows what they’re doing won’t cast the spell within our dispel range if they can avoid it.
How to Deal With Black Orcs in Warhammer: The Old World
Some lists have the tools to destroy the Black Orcs quickly, while others can only try to redirect them or keep them out of combat. The first step is figuring out which situation we’re in.
Remember that it’s often better to let them charge us with Furious Charge than to hand them an extra round of combat. If we charge them with a unit whose only job is to hold them up, such as a block of Goblins, Bretonnian peasants, or something similar, all we’re doing is giving them another round to kill our models. In those cases, it can be better to wait for them to charge, or even consider Flee as our charge reaction.
Another very good option is to get within three inches. Remember that Furious Charge only kicks in if the unit moves three inches or more when charging. If we stay inside that distance, we avoid those extra attacks in the first round of combat.
Plenty of units in the current meta rely on their charge bonuses to do serious damage. Denying them those benefits can make a huge difference.
On the other hand, Black Orcs have a solid 3+ armor save and Toughness 4. That means we need something that can punch through those defenses to destroy them quickly. One option is an elite character, usually mounted, with enough offensive power and durability to handle the damage the Black Orcs put out. Just remember that their champion will probably challenge us in the first round of combat.
If we can survive that first round, get through the challenge, and stay in combat, a really powerful character can tear through the Black Orcs from that point on. We also need to calculate the combat result bonuses: their standard, Unit Strength, Close Order, and anything else that might come into play.
If we can’t destroy them quickly, it’s usually best to tie them up with a cheap unit or avoid fighting them head-on.
How to Deal With Hobgoblins
It’s a similar story with the Hobgoblins, although their role is very different. If we have something that can tear through a Hobgoblin block in one or two rounds of combat, sending it into them can be a good idea.
If we don’t, the important thing is to stop them from holding up one of our much more expensive units for too many turns. That’s exactly why they’re in this list: to act as bait, stop the enemy, and leave far more valuable troops stuck fighting a bunch of slaves for the rest of the game.
We need to avoid falling into that trap.
How to Deal With Flying Large Target Characters in Warhammer: The Old World
Now let’s look at the list’s two Large Target characters. They’re both mobile and tough, but we shouldn’t forget that they’re relatively cheap compared with the game’s other big monsters.
A truly powerful monster, such as a Chaos Dragon or a High Elf Dragon, should have a good chance of beating either the Wyvern or the Bale Taurus. So if we have one of those big dragons, we can afford to be fairly confident against them.
Our opponent can’t just throw one of their characters into us, because they know they probably won’t kill us in a single round and will then have to take our attacks back. And if they charge with both characters together, we can use a challenge to limit one of them. For the same reason, combining one of those characters with an Iron Daemon can also be awkward against certain enemies.
If we have war machines that can cause Multiple Wounds, such as cannons or stone throwers, I’d prioritize the flying characters over the Iron Daemons when all those targets are equally available. That said, if there’s a chance to finish off an already wounded Iron Daemon, I’d certainly consider blasting it too.
How to Handle Iron Daemons Against Chaos Dwarfs in The Old World
A lot of lists simply can’t destroy an Iron Daemon.
If yours is one of them, you need to decide which unit you want to tie it up with so it doesn’t score too many points over the game and, above all, causes as little trouble as possible.
Trying to mess with it using light troops, baiting charges and constantly fleeing, isn’t always a good option, because the Iron Daemon can also shoot. And it’s pretty good at it.
In melee, remember that a large part of its damage comes from its Impact Hits and Stomp Attacks. Its other attacks matter much less. So if we have a unit with a banner that prevents Stomp Attacks, it can be a particularly good choice for dealing with one.
Army List Combos
This list really doesn’t have many particularly complicated combos. It relies much more on the individual quality of its units and how well we coordinate them than on building elaborate combinations. Even so, there are a few important synergies.
Steed of Shadows on Infantry
As always when we bring a Daemonology Wizard in a Chaos Dwarfs army, one of the most obvious combos is to send an infantry unit flying up the board with Steed of Shadows. This is an infantry army through and through, so getting a unit to fly 24 inches forward can be decisive.
Here, we’re usually talking about using it once on a particular unit. Why? Because our Wizard is riding a flying creature, there’s a good chance that infantry unit will be outside his vision arc next turn. So we need to choose very carefully when to cast it and which unit to target.
Combined Charges With Both Characters
Running two characters on flying Large Target mounts lets us charge the same unit with both of them. This combination partly solves one of the biggest problems with charging a single monster into an enemy unit that has a champion.
If we’re challenged, we might cause very few casualties and fail to win that first round by a big enough margin. That’s a serious risk, especially with a very expensive character. Being able to charge with both characters gives us more control over the situation and makes certain fights much safer.
Iron Daemons and Infantry
The Iron Daemons’ mid-range shooting, combined with the threat of a charge, works especially well alongside our army’s slow infantry units. The Iron Daemons can cover their flanks and make it harder for the enemy to get around them and set up a combined charge. That way, our blocks advance protected by two very tough machines that can also do plenty of damage at range.
Sneaky Gits and Backstab
Don’t forget the Sneaky Gits’ Backstab rule. At certain points in the game, it can be decisive when setting up a combined charge with another infantry unit.
If we can get the Sneaky Gits into an enemy unit’s flank or rear and charge, we can re-roll failed rolls To Hit. They have two Strength 3 attacks per model, which isn’t bad at all. And quite a few models can get into the fight, so even though their Strength is fairly low, the number of attacks and the re-rolls can help us cause a respectable number of casualties in a combined charge or against an enemy light unit.
The List’s Non-Negotiables
The Iron Daemons’ Hellbound Upgrade
The Iron Daemons will always have the 30-point upgrade. It’s worth its weight in gold.
For starters, going from Fear to Terror is excellent on a model that will almost never face an enemy with a higher Unit Strength. And a 6+ Ward save on a model with that many Wounds and that much Toughness is very useful too.
Finally, being able to re-roll an Artillery die can get us out of trouble or let us destroy an enemy unit on that crucial turn when we need our shooting to deliver. All in all, I consider it pretty much mandatory.
Loadout for the Black Orc Warboss on Wyvern
The Black Orc Warboss on Wyvern will always have a fairly similar loadout. The idea is to give him a good armor save, a Ward save, and Regeneration.
So if the Talisman of Protection is available because we aren’t using another model that needs it, we can give it to the Black Orc too. In general, though, since this character can use a shield, I’d rather take advantage of that and get a Ward save from one of his magic items.
What matters is making him tough enough to survive the fights we’re sending him into.
Possible Changes to This Army List
For me, the appeal of this list is bringing four Large Targets that cause Terror. It’s a big part of the list’s identity and one of the things I like most about it.
Still, there are several changes we can consider without necessarily making it less competitive.
Changing the Sorcerer-Prophet’s Mount
The Wizard also works very well in other setups. We can put him on a Lammasu or even run him on foot. Each option has its pros and cons, changing his mobility as well as how we use his magic and keep him safe during the game.
Replacing the Black Orc’s Wyvern
Another option is to give the Black Orc Warboss the magic item that lets him fly and makes him Ethereal. It’s a new 50-point item that I explain in my article on Arcane Journal: River of Bones.
In that case, his magic item loadout would change, and he’d generally be much cheaper because we wouldn’t be paying for the Wyvern.
Changing the Number of Sneaky Gits
The number of Sneaky Gits can also change. We can use bigger units to improve our chances of destroying certain targets when we send them flying with Steed of Shadows. That lets us concentrate more attacks on the part of the board where we actually need them.
Changing the Infernal Guard’s Equipment
The Infernal Guard’s equipment can change too. The idea here is to keep the unit as cheap as possible while still getting some use out of it. That’s why we’re only paying one extra point per model for shields.
That said, I still see players running these units with their fireglaives, even though that makes them considerably more expensive. I think this one comes down to personal preference.
Honestly, I’d rather have ten more Goblins than ten fireglaives.
Reorganizing the Hobgoblins
Speaking of Hobgoblins, another interesting option is to replace one of the big blocks with three smaller units that can hold objectives. Personally, I really like using them that way, deployed in Marching Column.
They also work very well as screens. We can put them in front of or behind an Iron Daemon, depending on what we want them to do during the game. This change gives the army more flexibility and lets us spread our units across the battlefield more effectively.
Changing the Black Orcs’ Weapons
The Black Orcs’ equipment can change too. I’ve seen people run them with plenty of great weapons, going for a much more aggressive setup.
It’s an interesting option, especially since their basic armor save is 4+, and giving them shields won’t let us improve it to 2+ through the Parry rule. Remember that this rule can’t improve an armor save beyond 3+.
So we can choose between making the block tougher with shields or improving its damage output by adding more great weapons.
Recommended Miniatures for This Army List
One of the things I like most about this list is that it combines some of the Chaos Dwarfs’ most iconic elements with monsters, war machines, and plenty of slaves. If you want to build an army like this, here are my miniature recommendations.
Sorcerer-Prophet on Bale Taurus: Which Model to Use
For the Sorcerer-Prophet on Bale Taurus, I’d use Urak Taar, the First Daemonsmith / Daemonsmith on Infernal Taurus. I should point out that I don’t use that one myself. Mine is the Age of Sigmar Beastmen spell that looked like half a bull being summoned, but it’s no longer sold.
Black Orc Warboss on Wyvern: How to Convert One
For the Black Orc Warboss on Wyvern, I really don’t like the Megaboss on Maw-krusha, nicknamed “the lettuce.” It’s also very wide, which can make fitting it onto such a narrow base a real headache. Its Age of Sigmar base looks like a paella pan.
I have two converted Wyverns, built in these two ways:
- One started as a Kruleboyz Sludgeraker Beast. I added wings made from melted plastic. It was a real chore, and I wouldn’t recommend it to anyone.
- The other started as a Stormcast Eternals Stormdrake Guard. I left off the front legs, filled the gaps with putty, and replaced the head.
Infernal Guard: Which Models to Use
If you don’t have the old Warhammer Fantasy models, the Age of Sigmar Infernal Cohort looks like a very good option for representing Infernal Guard.
Hobgoblin Cutthroats and Sneaky Gits: Models and How to Tell Them Apart
I like the same models for both Hobgoblin Cutthroats and Sneaky Gits: Hobgrot Slittaz. But using the same models for everything is kind of shit. To tell them apart, especially if you already have an Orc army, I’d use Night Goblin Mob models as Hobgoblin Cutthroats and save the grots for the Sneaky Gits.
Black Orc Mob: Models and Ranking Them Up
Here’s the problem: both the old Black Orcs and the new ones are a pain to rank up. I use the Age of Sigmar Orruk Ardboys because I really like them.
They’re pretty big. Mine are on round bases, and I put them on a square movement tray for the whole regiment.
The traditional plastic Black Orcs are another option, but to me they don’t have the charm of the old metal ones, like that standard bearer with a Dwarf stuck on a pole. I can’t think of an option I like better than the new ones.
Which Models to Use as an Iron Daemon
There are several alternatives for the Iron Daemon, depending on the look you want for your army. I like the Chaos Space Marines Venomcrawler with some conversion work.
I don’t like the original Forge World locomotive on its own. The whole train, with the war machines and cannons, looks great for its time, though I think we have better options nowadays.
- A Chaos Space Marines Venomcrawler, with a few modifications. The linked box is Warpforged: Venomcrawler and Obliterators, which includes one Venomcrawler and two Obliterators.
- The Chaos Space Marines Forgefiend. It’s the one I’ve seen used most often, although it’s my least favorite. I’m not sold on the plasma cannons or the head.
- Kharadron ships: the Arkanaut Frigate or Grundstok Gunhauler. They have cannons and could look really interesting with the crew’s heads swapped for Chaos Dwarf heads. I’d also file off or cover the original symbols with symbols of Hashut or Chaos stars.
- The Helsmiths of Hashut Dominator Engine, a sort of bipedal metal bull that can be built with cannons on its arms. It would be a very personal take on an Iron Daemon, but I like it.
Related Articles:
Latest Blog Posts
Any errors in the post? feel free to reach out at theoldwarrior@theoldwarrior.com.